
Network chart
The network chart in Hubstream Classic helps users visualise links associated with an investigation. It shows the flow of information and the relationships between different links of an investigation.
Once one or more links have been added to an investigation, follow the steps given below to view the network chart:
-
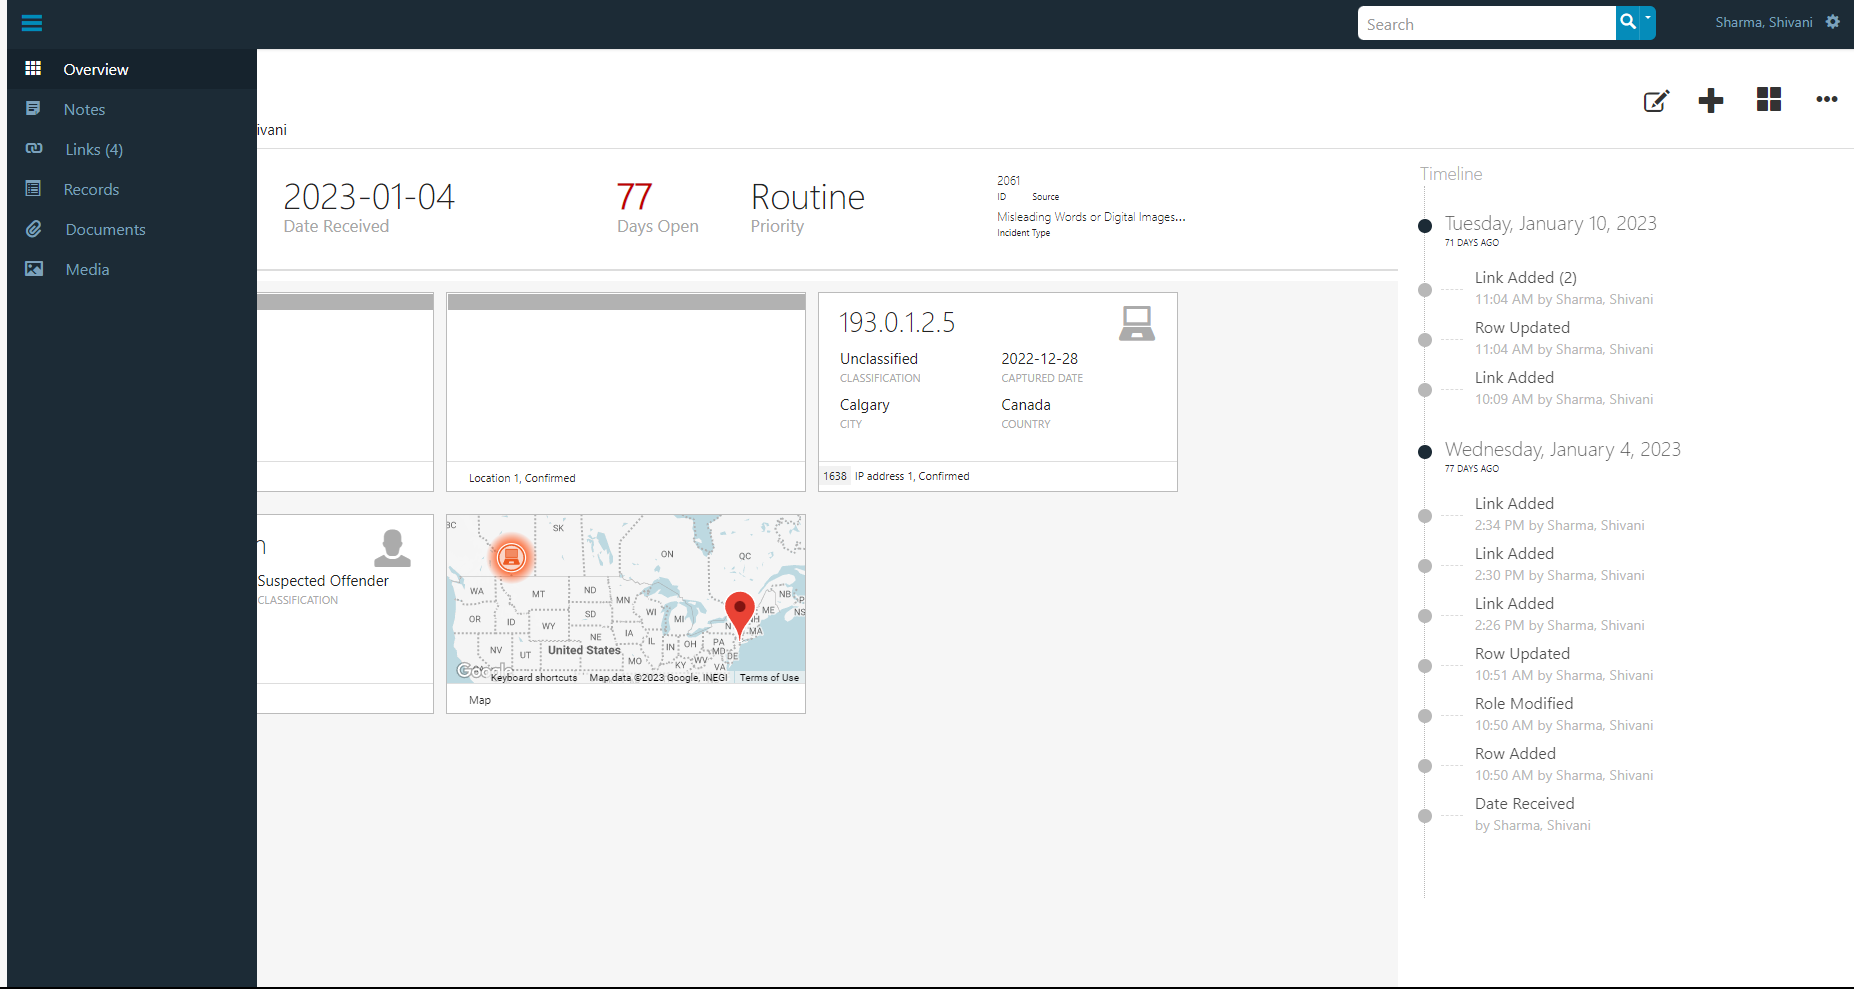
From the user dashboard, click on an investigation to open it.
-
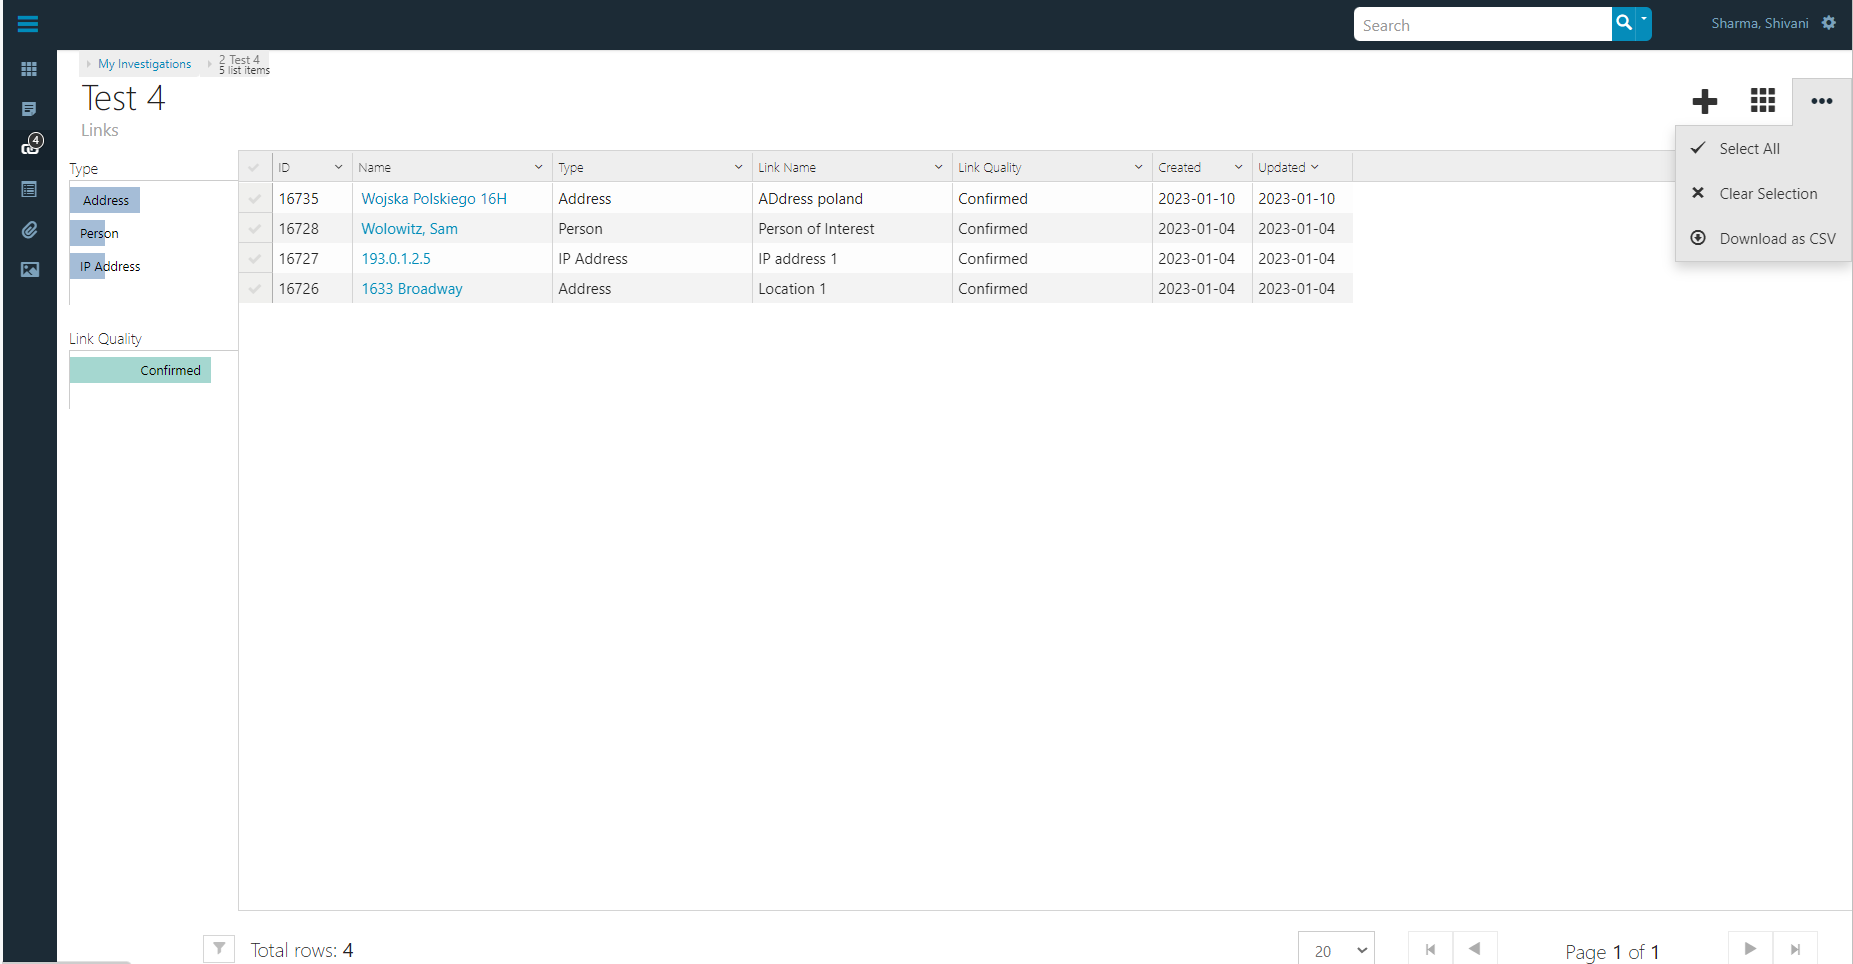
Once in, open the side bar and click on Links. A list view of links will open.
-
On the top right, there will be a grid icon called View. Click on it.
-
From the dropdown that opens, select Network Visualization. The view will change to a network chart of links.
-
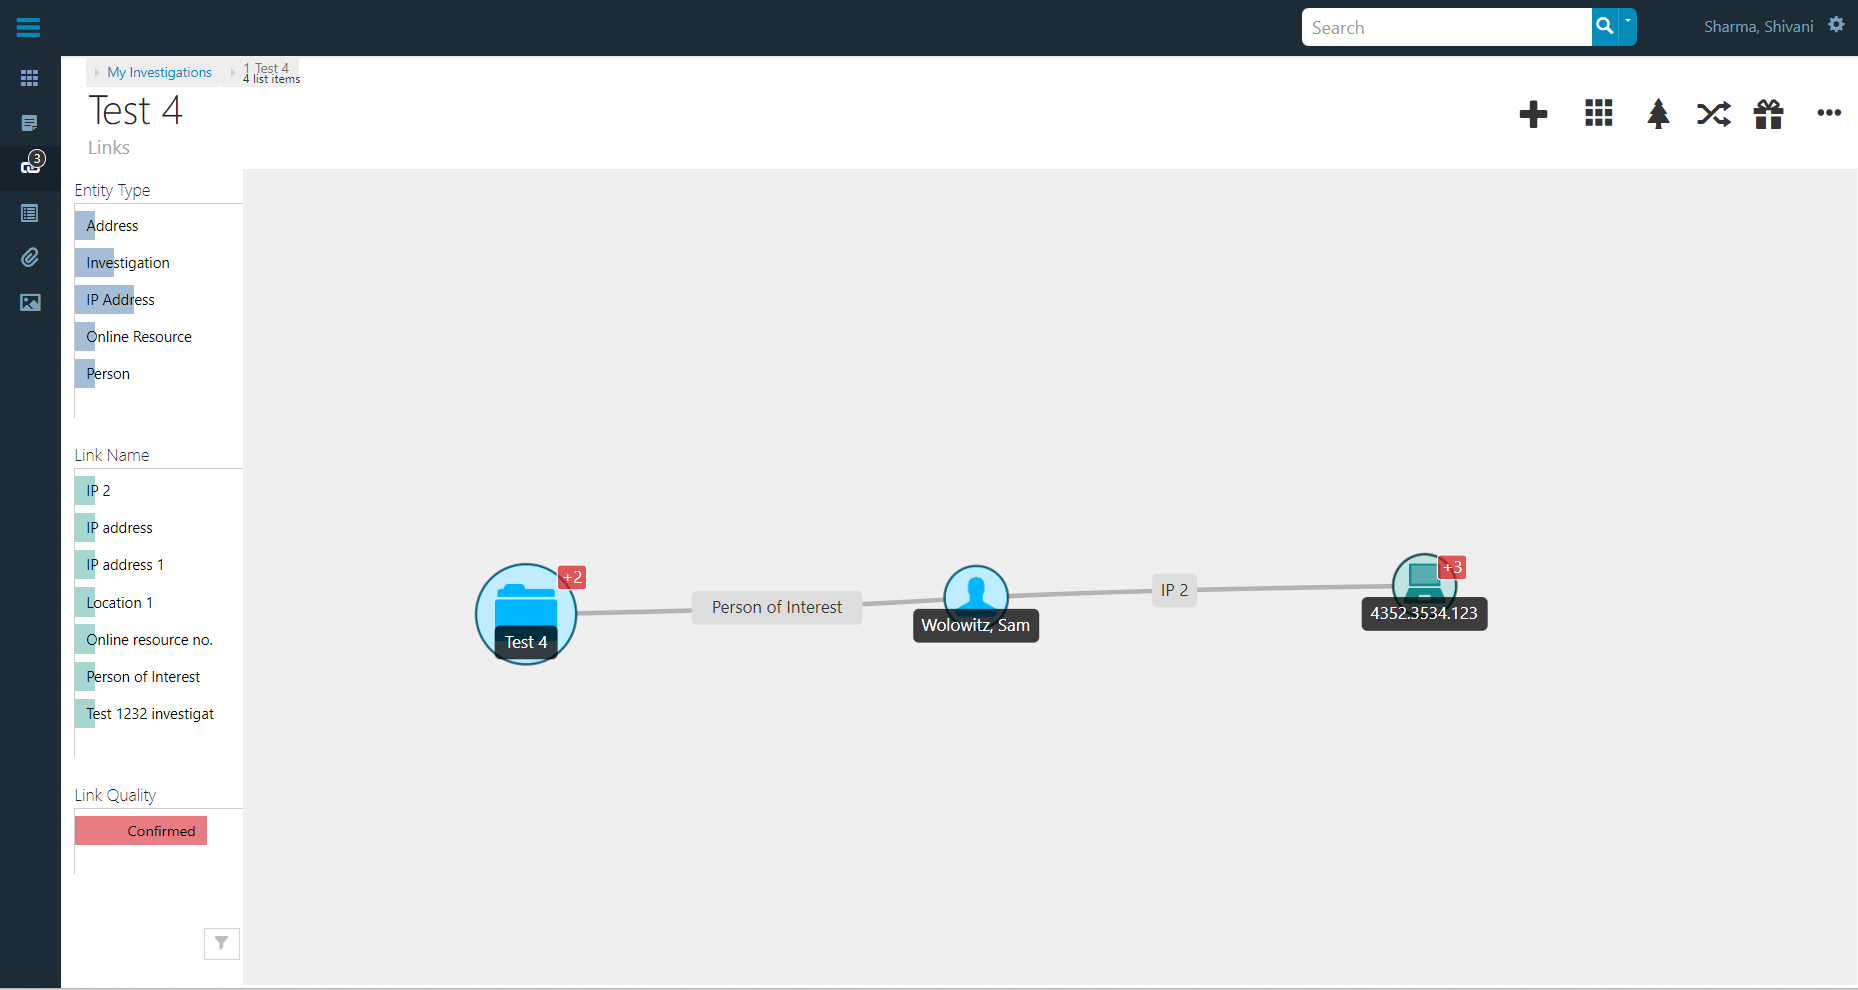
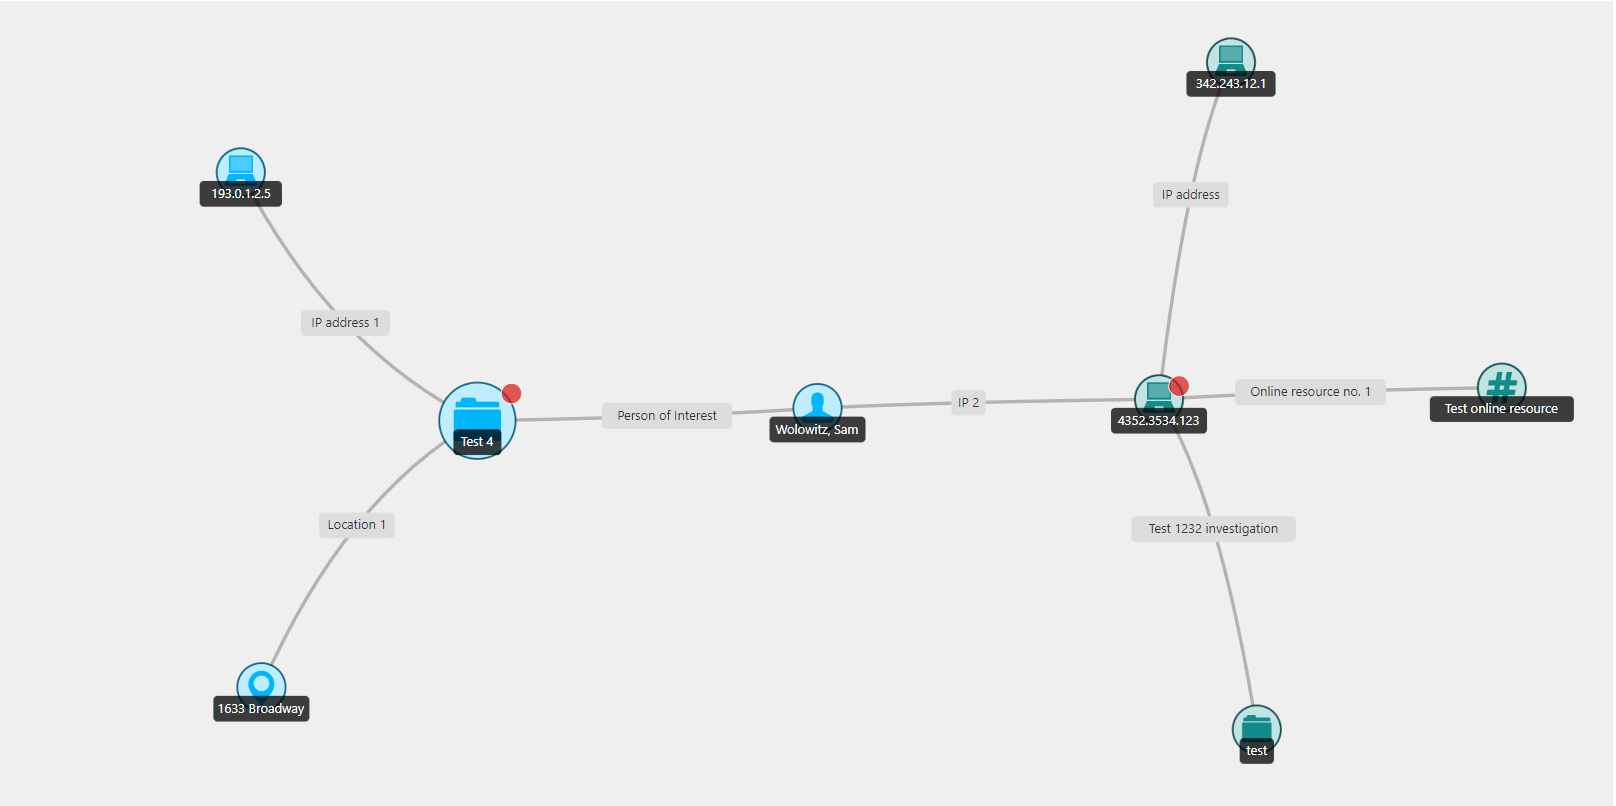
Some links in the network chart will have a circle on the top right containing a plus sign followed by the number of related links.
Click on the circle to expand the network chart and view the related links. The number disappears when the node is expanded. Click on the empty circle to close the expanded node.
-
On the left side of the network chart, various filters are present. The network chart can be filtered using different entity types, link names or link quality. The type of filters shown depend on the type of links available and their field values.
Click on any filter to apply it. The network chart will change accordingly.
-
On the top right of the network chart, various options to modify it are available
- Add: The first one is the plus icon that lets the user add more links to the current investigation.
Click on the plus icon to open the dropdown. Choose the desired type of link, add details and click on Save and close. The new link will be added to the current investigation. Expand the current investigation node to view it.- View: Click on the nine-dot icon called View on the top right of network chart. Three options to change the view are available, i.e. List, Details and Network Visualization.
Click on any other view to change the view. Don't take any action if no view change is required.-
Tree Layout: Next is a tree icon called the tree layout which shows the network chart in a tree layout. Click on it to change the network chart to tree layout.
-
Horizontal Tree Layout: Click on horizontal arrows icon to change the network chart to a horizontal tree layout.
-
Spatial Layout: Click on the Gift box icon to change the network chart to a spatial layout.
-
Other options: Click on the three-dot icon to open a dropdown containing other options to modify the network chart. The dropdown contains four options, i.e., Expand All, Collapse All, Save Layout, and Clear Saved Layout.
 - **Expand All**: It expands all the nodes of the network chart without having to click on different nodes one-by-one. Click on it to expand all the nodes. - **Collapse All**: It collapses any or all the expanded nodes. Click on it to close any expanded nodes. - **Save Layout**: It saves the layout in its current form. Click on it to save the layout. - **Clear Saved Layout**: It clears the saved layout. Click on it to remove the saved layout.